When the state page of the charger needs to be checked, or the configuration parameters changed, please follow the steps below.
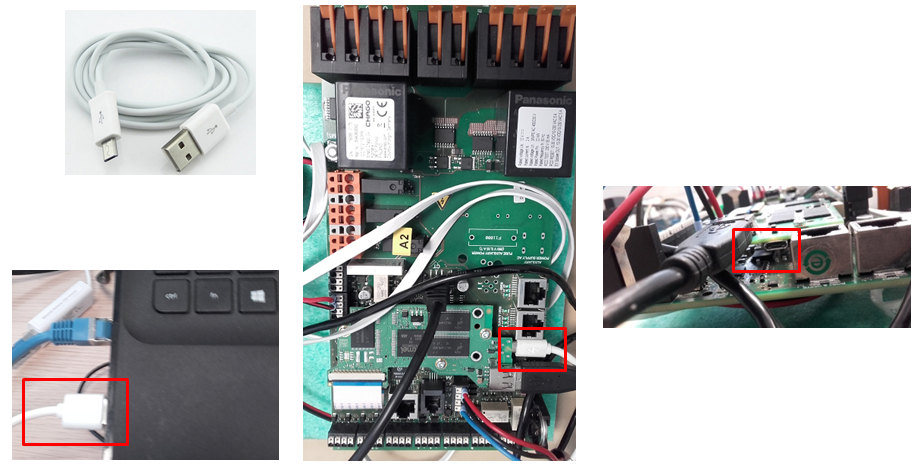
The Micro-USB cable used in this topic must be a USB data cable and not charge-only Micro-USB cable.
Step-by-step guide
- Take Micro-USB cable and connect the USB-A connector to your Windows 7 or 10 laptop and the Micro-USB connector to Slave (right hand side) controller
- If required, install the RNDIS driver for Windows
- Open web browser (for example Chrome or FireFox)
- Load the below web pages depending which controller's state page you want to see
- If you need to access the Master controller, open page: http://192.168.123.123:81/state
- If you need to access the Slave controller, open page: http://192.168.123.123/state
- Load the below web pages depending which controller's Operator page you want to see
- If you need to access the Master controller's Operator page, open page: http://192.168.123.123:81/operator/operator
- If you need to access the Slave controller's Operator page, open page: http://192.168.123.123/operator/operator
- If the web page asks for login credentials, please provide the login credentials
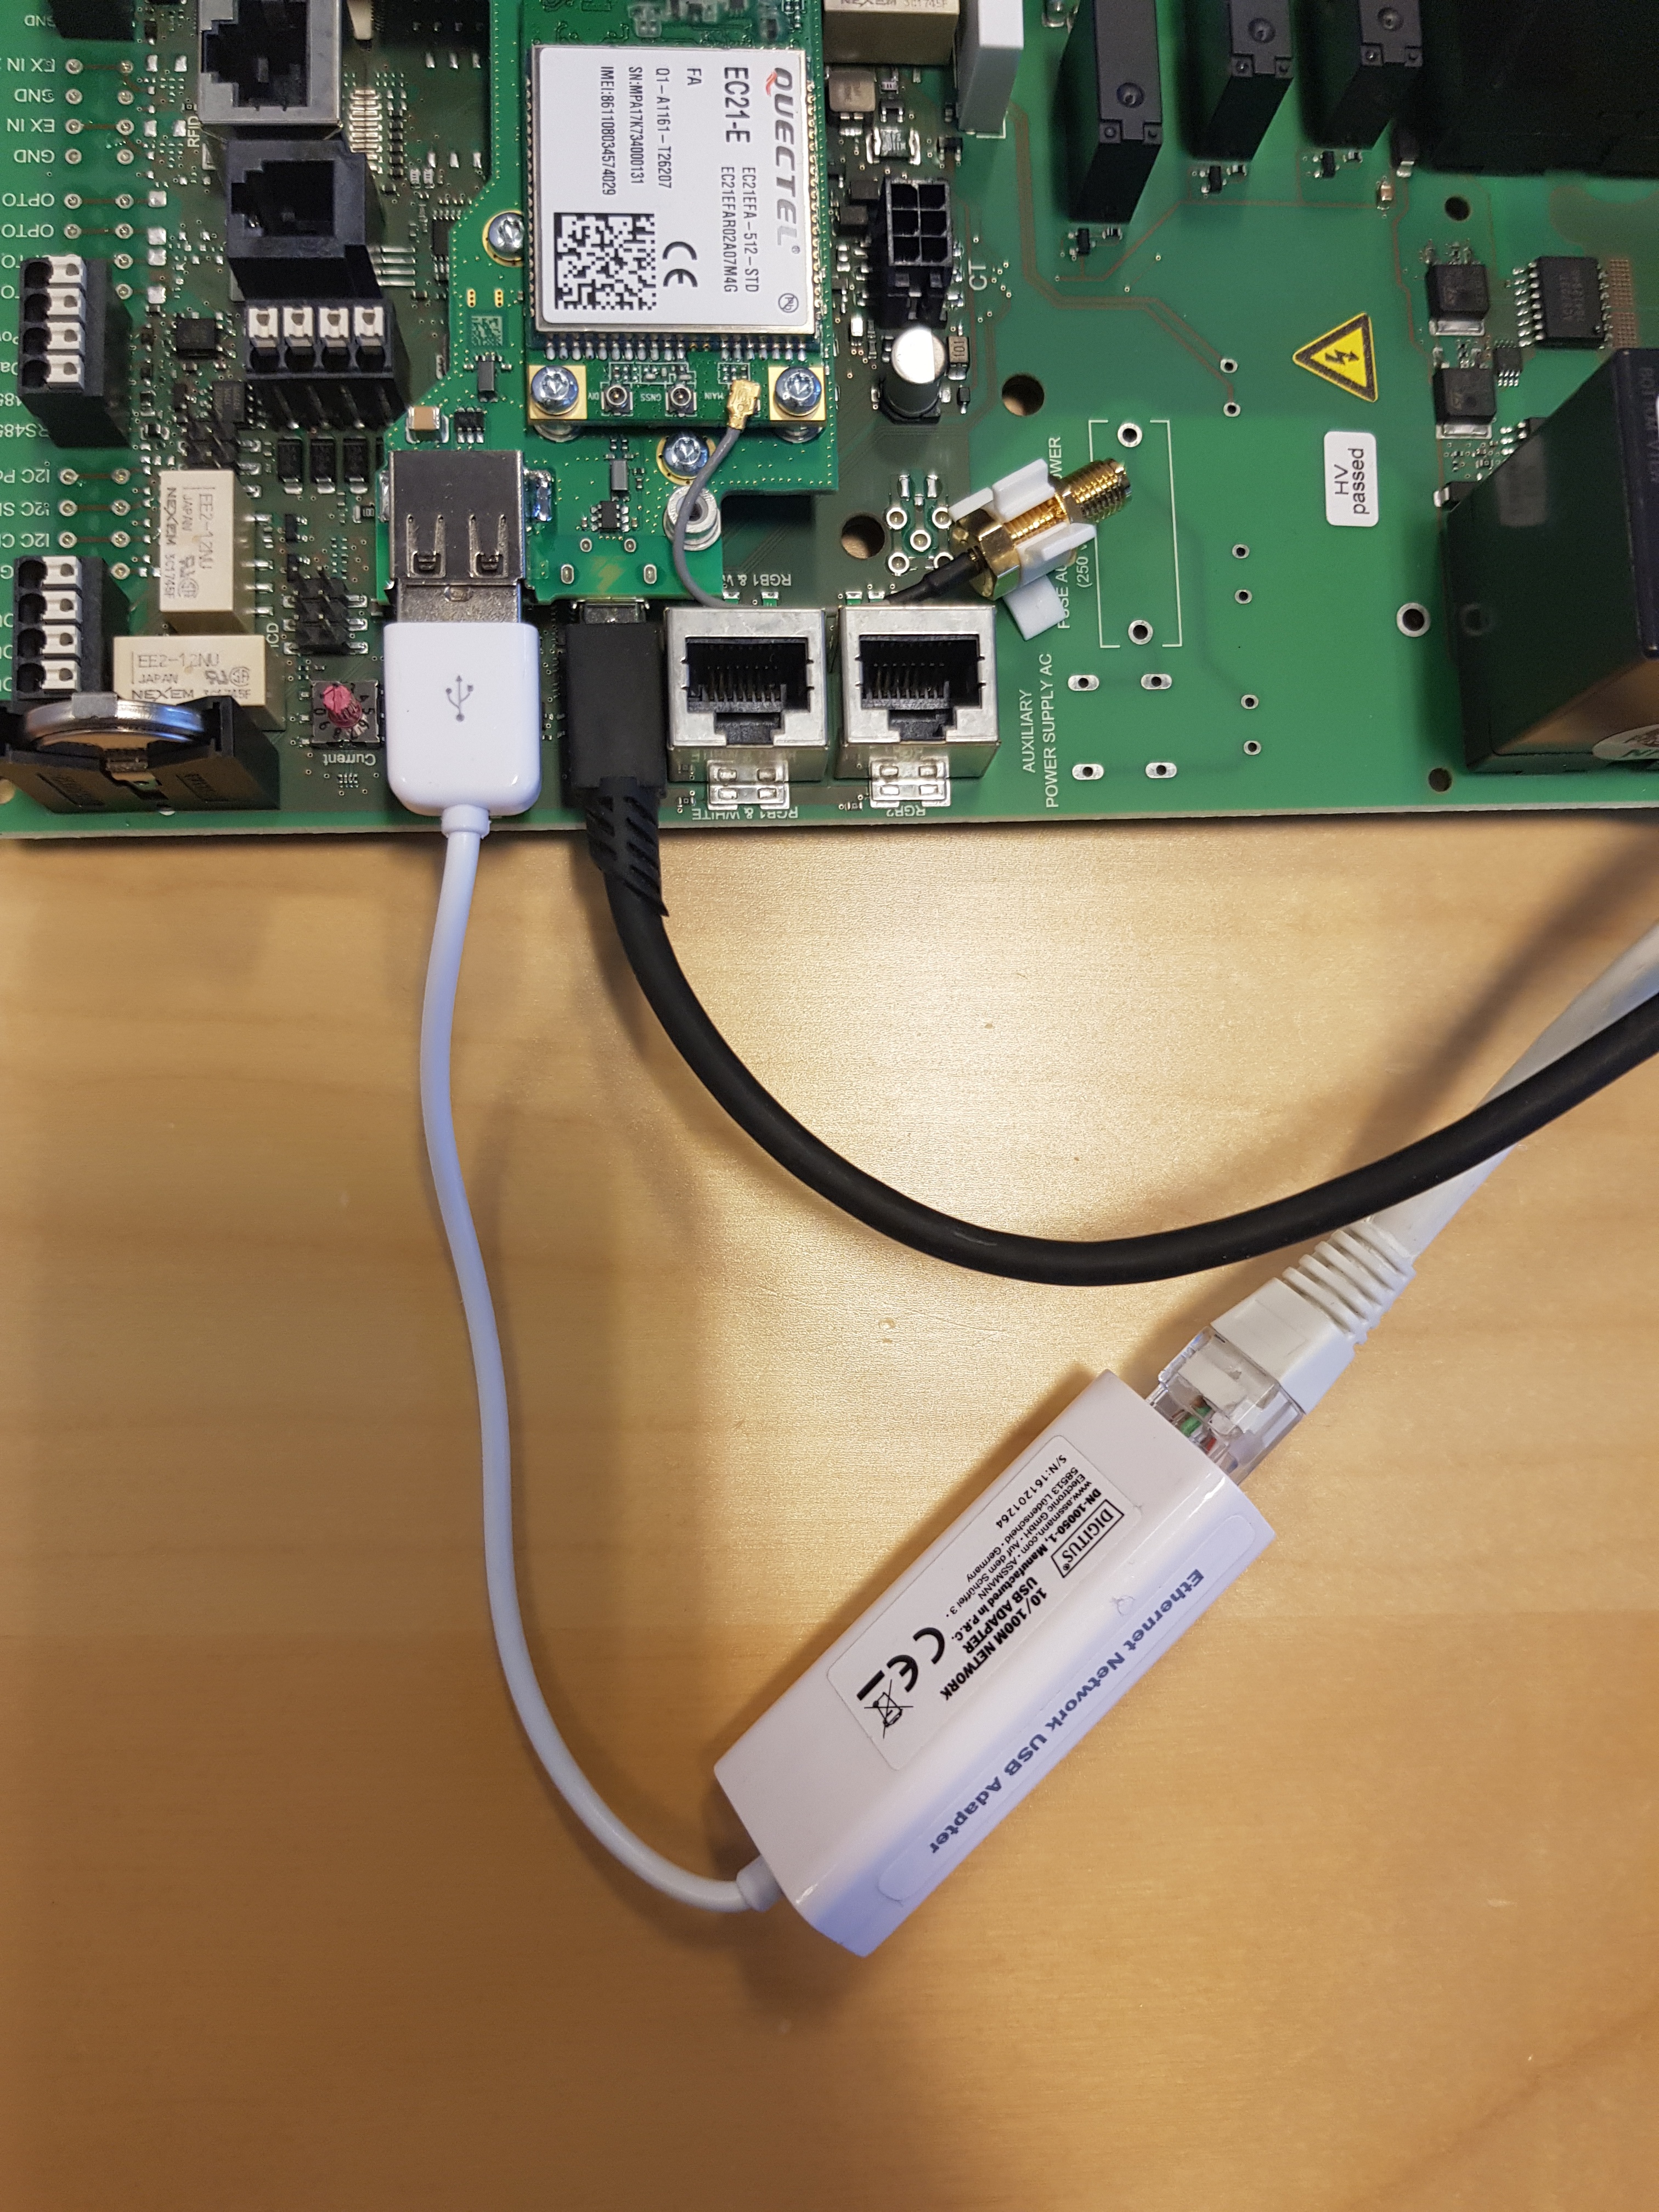
Another possible way to connect laptop to controller
USB-to-Ethernet adapter is needed. It must to be inserted into USB-A connector (in dual sided charger you have to connect the connector in to the controller board you are trying to configure).
From the USB-to-Ethernet adapter the Ethernet cable goes in to the laptop.
- You will need to change the IP-address of your laptop to static address.
- For example: (IP-address: 192.168.124.120), (Subnet mask: 255.255.255.0), (Gateway: 192.168.124.1).
- Open web browser (for example Chrome or FireFox).
- Open state page: http://192.168.124.123
- Or open operator page: http://192.168.124.123/operator/operator
- If the web page asks for login credentials, please provide the login credentials.
Related articles
Content by label
There is no content with the specified labels